31 May 2012

Birthday Weekends

This weekend is going to be a busy one, we are celebrating two Birthdays with friends and family. 

In the spirit of celebrating and all the delicious goodness which comes with Birthdays, here is a Chocolate Cake recipe I stumbled upon recently which looks truly delicious.


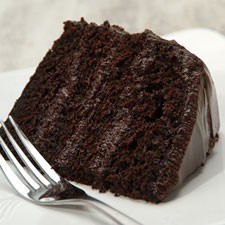
Gorgeous Birthday Cake. Image from Pinterest. 


It has some similarities to the Red Velvet Cupcakes, by the fact is also has buttermilk, which definitely seems to the the secret ingredients to getting perfectly moist sponge cakes. 

Chocolate Buttermilk Layer Cake

Ingredients:

This recipe makes one medium sized cake with 2 layers, but I would suggest doubling this recipe to make one large cake with 4 layers, baking it in 2 batches. As with a Red Velvet Cake, this Chocolate Cake will be the centre of attention, the bigger, the better, more for everyone. 

Cake:

1 Cup water 125 g butter, cubed
1/3 Cup cocoa powder, sifted
2 Cups flour, sifted
1t Baking soda, sifted (bicarbonate of soda)
2 cups (440 g) caster sugar
2 eggs ½ cup (125 ml) buttermilk
1 t (5 ml) vanilla essence/extract
Icing:

250g Plain Cream Cheese, at room temperature
100g Butter, softened
2 Cups icing sugar, sifted
50g Cocoa powder, sifted


Method:

Preheat oven to 160 C.

Place water, butter and cocoa in a saucepan over medium heat and stir until butter has melted. Remove from heat.

Place flour, baking soda and sugar in a bowl, add the cocoa mixture and whisk to combine. Add the eggs, buttermilk and vanilla and whisk to combine.

Divide mixture between 2 greased and lined 20 cm round cake tins, then bake for 40-45 min or until cooked when tested with a skewer. Please ensure you watch this cake after about 30min, every oven is different, if you are unsure if its cooked, rather do the fork test around the 35min mark. Poke a clean fork into the centre of the cake, if it comes out clean it's done, if not, leave it for another 5min and check again depending on how uncooked the mixture/sponge is. 

Allow to cool in the tins for 10 minutes, then turn out on wire racks to cool completely. Try and avoid putting cooling sponges in a draught, I'm always paranoid the sponge dry's out.

Icing: 

Now for the icing, pop the butter and cream cheese in a bowl, mix and beat with an electric beater for about for 6-8 minutes until pale and creamy. 

Add the icing sugar and cocoa and beat for a further 6-8 minutes until light and fluffy.

To assemble, slice off the round tops of each cake layer to produce smooth, flat layers. Try using a long, non serrated knife for a clean cut. Some baking shops sell cake wire, which looks very professional, I tried it and failed dismally. A knife also works :)

Place one layer on a pretty cake plate, spread with the icing, then put the remaining half on top and cover with icing, until you have all four layers in a pile, icing in between and on top.

A tower of chocolate.


Bit like a Chocolate Velvet Cake. Image from Pinterest. 


I plan to make this over the weekend, and will pop some pics up of how it turns out.

Let me know if you have any cake recipes you'd like to share, and I'd love to hear about it, if you make this cake and what you think!


Can't wait to get baking! Image from Pinterest.


Enjoy!

xx C

Tips: You can decorate your cake with anything you fancy, cherries, sprinkles, crumbled Cadbury Flake or pretty sugar hearts.

For something WOW try a single colour of bright sprinkles, as in the picture about, really does give the cake some extra drama. 


29 May 2012

Hot Chocolate

Today is a very cold and wintery day in Cape Town, definitely time to start unpacking those Winter knits if you haven't already. I love Winter, warm fires, big glasses of red wine, and one of my favourites, Hot Chocolate. Nothing beats a great cup of Hot Chocolate. 

Mmmmm Chocolate. Image from Pinterest


Whether you love it with sprinkles of chocolate on top, a teaspoon of Nutella, marshmallows, foam or cream, I always think my Mum's Hot Chocolate is the best.  


I'm always looking for a great recipe and something new to try, please send me your favourites


xx C

28 May 2012

Doing the laundry...


The French Laundry. 

No, not somewhere Parisian with stylish people eating macaroons and waiting for their washing to be cleaned. It is however, a world renowned restaurant based in California, which if food excites, intrigues, possibly scares you, is on your bucket list. I know it’s on mine. I love the idea of this restaurant, sunny California, French Cuisine where every detail, ingredient, pinch of salt has a purpose and adds dimension and flavour to every dish. 

In the end, a great meal is not about the food and wine. A great meal is an emotional experience. A great meal is a kind of journey that returns you to the sources of pleasure you may have forgotten and takes you to a place you haven’t been before”. - The French Laundry, Philosophy.  


The French Laundry - Image from Pinterest


I bought myself the French Laundry Cookbook last year, in a moment of inspiration, rushed home to consume each and every recipe on my couch, and after 15min of paging through had a complete panic attack. 

This recipe book is on another level. Now, don’t get me wrong, I love cooking, it’s my passion, my favourite thing to do, and recipe books are my quiet place where I can spend hours just me and absolutely delicious inspiring recipes, it doesn't scare me, it inspires me. 


There it is, in all its Glory. Image from Pinterest.


This recipe book scared me. In fact it terrified me. I closed it, popped it onto the shelf and chose to ignore it, completely in denial that I couldn't cook anything out of it. And to be honest. I have yet to, almost a year later, even open it. Fail.

This past weekend however, after the book has glared at me every time I walk into the kitchen, whispering “you have failed me, just attempt something!”, I opened it, and went through every recipe, and have decided I need to start somewhere. 

Now this isn’t a “I wish I was Julie from the movie Julie, Julia” – this is Carey, put on your big girl panties and cook something which makes you uncomfortable (Eeeek) and someone will eat it, even if they lie and tell you it was fabulous, they WILL eat it. 

So after 25min of staring at the content page in fear, trying to work out what sounded, yes, I’ll admit easier, I couldn’t decide between “Braising and the Virtue of the Process” or “Beurre Monte: The Workhorse Sauce”. 

The menu, so inspiring. Image from Pinterest.


Something caught my eye “Infused Oils”. What could be so hard, start easy, you’ll get into it.
What I thought – 1 part oil, 1 part herb, shake, and bob’s your uncle – infused oil. No. You guessed it. I was wrong. 

Herb Oils – where to start

For all herb oils, bring a large pot of salted water to a boil. Use about ¼ cup of salt for every litre of water. Place the herbs in a strainer and dip them into the water for the allotted time (we’re getting to that, don’t worry), keeping the water at a rapid boil. Remove the strainer and immediately plunge the blanched herbs into an ice-water bath to chill. 

Drain the cold herbs and squeeze as dry as possible. Using scissors to cut them into small pieces (you’ll get more flavour from cutting with scissors than with a knife, strange but true). 

Place half the herbs in a blender with enough of the specified oil just to cover. Turn on the blender to a medium speed and allow the herbs to blend for a minute to begin the process. 

Turn the speed to high and continue to blend for another 2 minutes. Add half of the remaining herbs to the machine and blend for another 2 minutes, then add the remaining herbs and blend for 2 more minutes. Pop the puree into a container and refrigerate for at least a day, this puree can be stored for up to a week, make sure the container is 100% airtight. 

So now, the oil recipes... These are the ones which caught my eye...

Rosemary Oil
  • 1 Cup Rosemary leaves
  • 2 Cups Italian parsley sprigs
  • 1 Cup Canola Oil

Blanching Time: Rosemary, 30seconds: then add the parsley and continue to blanch for another 10seconds. Makes ¼ cup.

Basil Oil
  • 3 Packed cups of Basil leaves
  • About ¾ cup of Olive Oil

Blanching Time: 15seconds. Makes 1/3 cup.

Mint Oil
  • 4 Packed cups Mint leaves
  • About ¾ cup Canola Oil

Blanching Time: 15seconds. Makes 1/3 cup.

Thyme Oil
  • ¼ Cup Thyme leaves and tender stems
  • 3 Cups Italian Parsley sprigs

About ¾ Cup Canola Oil
Blanching Time: Thyme, 30 seconds: then add parsley and continue to blanch for another 10seconds. Makes about 1/3 cup. 

Fabulous oil, for any occasion. Image from Pinterest. 


I have decided to challenge myself, and break the ice with The French Laundry, go on my first date, and make something with Thomas Keller (the Chef and Owner). These oil’s sounded delicious and a great place to start, to get over my fear, and soon I hope to venture out and attempt something spectacular like “Veloute of Bittersweet Chocolate with Cinnamon-Stick Ice Cream”


I’ll let you know once I’ve made these, please let me know if you have cooked anything from The French Laundry Cook Book, if you’ve eaten there and what your experience was. I would love to hear from you.

For more information on The French Laundry, please visit their website here.


xx C


25 May 2012

Erawan, two, three… {Guest Post}

Yup, that’s how many times I’ve been back since first sampling this little piece of Thai heaven. If you’re battling to say it out loud, it’s pronounced ‘air-a-one’. Now, you might be thinking that I am producing shining reviews on all restaurants to win favour, and alas, this is another shining review. 


But don’t despair – our search for a suitably horrible restaurant continues, and you, dear reader, shall be the first to hear about it.

Now let’s get to it. A large portion of Erawan’s charm is actually in its location. If you haven’t taken a stroll through Chelsea Village in Wynberg you are missing out. Apparently the area dates back to the first British occupation of the Cape in 1795 and is a concentration of historic Georgian style buildings and residential cottages. Chelsea Village was named an Urban Conservation Area due to its historical architecture and quaint layout. Of course, these days the village is a highly sought after residential location and as a result has attracted trendy shops and studios as well as a cosy pub and a few notable restaurants.


Image from Dining-Out.

The restaurant is heavily decorated, and quite posh for lack of a better word. Don’t be intimidated, the food is well-priced, and the service warm and friendly. The best way to describe the service is to liken to that of Singapore Airlines. If you’ve ever seen the air hostesses on Singapore Airlines you’ll know what I mean. You might be throwing your hands up in confusion, but the waitresses (who, judging from their grasp on the English language, appear to have just arrived in SA) are beautifully presented, and wrapped tightly in traditional attire, and epitomize politeness. Try not shout your order at them, they can hear you! It’s better to indicate your choice on the menu to avoid disappointment when the food arrives!

Whatever you do, DON’T SKIP STARTERS. The dim sum (although not traditionally Thai) is amazing, and don’t let them take the arrival snack dip options from the table, as dipping the dim sum in these just makes it. I chose the Sa La Pao Gai (steamed dumplings with spicy chicken, coriander etc.) and it was a good option.  For mains I have to confess that I have indulged in the same green curry each time I have been – the chicken option. The menu, unlike the wine list, is full of the usual options – stir fries, soup, curries, noodles etc. 

I’m not a foodie, so I won’t go into the turgidity of the green pepper, but Erawan is worth a visit – well priced, great service, easy to locate and parking isn’t an issue. If you are fussy about your wine selection then take a bottle from home.

Peruse their menu here, ring them up on 021 797 5000 or visit them at 15 Wolfe Street, Little Chelsea, Wynberg, Cape Town.

xx Lisa

To follow Lisa on Twitter, click here

24 May 2012

Red Velvet Indulgence

As you know, a couple of weekends ago, I cooked up a storm for Mother's Day, click here for more on that. As part of my gift, my mum got to pick something delicious for dinner - she picked Red Velvet Cupcakes. 

Now, if you've ever had a Red Velvet Cake or cupcake you'll know why she picked it, and if you haven't, well here is a super simple recipe to get you started!

Red Velvet Cupcakes
Cakes to Celebrate Love and Life


This is a fabulous recipe book, I've baked a number of delicious treats out of here, and every recipe just gets better and better. A must for anyone who has a sweet tooth.


Cakes to celebrate love and life, by Callie Maritz and Mari-Louis Guy - Image my own


Ingredients:


  • 2 1/2 Cups flour
  • 1 1/2 Cups sugar
  • 1t Bicarbonate of soda
  • 1t Cocoa powder
  • 1t Salt
  • 1 Cup buttermilk
  • 2 Eggs, at room temperature
  • 1 1/2 Cups vegetable oil
  • 1t White vinegar
  • 5t Red food colouring
  • 1t Vanilla essence
  • 1 x Quantity Cream Cheese Icing

Equipment:

  • Makes 24 Cupcakes , or
  • Three-layer 18cm cake tin , or
  • 23 Single layer cake tin

Method:

Preheat the oven to 180C. Prepare your choice of baking pan as mentioned above. In a large mixing bowl sift the flour, sugar, bicarbonate of soda, cocoa powder and salt together.

In another mixing bowl combine the buttermilk, eggs, oil, vinegar, food colouring and vanilla essence.


Everything in, before the mixing begins.


Mix the flour mixture into the buttermilk mixture.

Pour the batter into the prepared pan or bake for 30 - 35 minutes for a large cake, and 18 - 20 minutes for cupcakes - please note this is entirely dependent on your oven. Please keep checking, burnt cake is the saddest thing ever.


I love cute cupcake holders - these are from Woolworths. 


When the cupcakes are done, leave to cool in a non drafty spot.


Warm out of the oven. Yum.


Now, I was very silly, because after the fresh from the oven pic, the kitchen went a little haywire with Soup, Steak, Sauces, Salads and Potato's and I just didn't have a moment to show a step by step for the icing. But it really is a piece of cake {hehe, see what I did there}


Icing:


Ingredients:
  • 1 Tub firm cream cheese
  • 250g Butter, softened
  • 2 Cups icing sugar, sifted
  • 1t Vanilla essence

Method:

In the bowl of an electric mixer with the paddle attachment, beat the cream cheese and butter until light and fluffy. Add the icing sugar and beat through. Add the vanilla essence and beat until just combined. Keep tasting the icing, I find that if it's a little too sweet, I add a little bit of lemon juice or lemon rind. You don't want it too lemony, keep tasting and you'll know when it's just right.

I leave the icing in the fridge while the cupcakes are cooling.

Spoon the icing into the icing bag, and pipe the icing on. I use a traditional cake icing bag, which I got from Banks Catering in Woodstock, check out their website here 

Simple, easy, delicious. 

Due to the hustle and bustle of that day of cooking, I didn't even get a pic of the final cupcakes. 

Below are some gorgeous Red Velvet Cupcakes, which inspire me. Mine looked quite similar, but maybe not as professional, and more on the "home-baked with love" side. But they don't last long in our household, so it doesn't really matter.


                        Gorgeous. Image from Pinterest


Let me know if you've tried Red Velvet as either Cake or Cupcakes, 
or what your favourite cake is. I'd love to hear from you!


xx C

23 May 2012

Greenhouse Splendor at the Exotic Plant Company

As you know, we recently spent the day in Franschoek. For more on that, click here


One of the activities we had planned was a visit the Exotic Plant Company at Môreson. What a treat!

After a superb lunch at Bread & Wine, we walked over to the greenhouse for a look around.


I've had my fair collection of plants, from Cacti, to Rock Roses,  Conifers and little pompom bushes, hanging baskets of flowers and herbs, to Orchids and Geraniums, and this spiky guy on my coffee table which I don't have a clue about. 


Never mind the cute rabbit, what is the Spiky Plant, anyone?


I don't have a garden (just yet), instead I have pots and freshly cut flowers. My favourites (yes, I'll admit I do have favourites) are my Orchids. I adore them, they take pride of place in my home and I do spend quite a bit of time, staring at them, worrying about them, talking to them, moving them about and just generally being in love with them. Don't be fooled. Orchids, are not easy. They can be extremely temperamental, and difficult for the sake of being difficult, however are also incredibly rewarding and beautiful. When I see a new bud or root growing, I literally swoon and bask in the glory of botany splendor. 


So, what did the Exotic Plant Company have in store? Orchids. A whole greenhouse full of Orchids. I was in my element. I was that person who stood in the doorway for a minute with my mouth down to the ground, and my purse shrieking in terror. Orchids. A whole greenhouse full of Orchids.


Have. You. Ever? 


My fiance (bless him) saw the excitement in my eyes, and heard the terror of my bank balance, and very sweetly offered to buy me one. Just one. I could have filled my car with leafy greenness and driven into the sunset, poor, but happy. So now, to choose.


What a choice, there is an extensive variety of Orchids on offer, have a look on their website here, for an idea. Now imagine, all of these plants, looking up at you and saying "I'll look just gorgeous on your coffee table next to the antique silver frame, pick me" I was a tough choice. It did ask the advice of one of the greenhouse assistants and would suggest you do too, as selecting the right one can be tricky. I went straight to the plants which were in full flower and looked tremendous, but was guided to a section of other Orchids, which looked at first a bit disappointing, but on closer inspection had all the magic I was looking for. New buds, or as Orchid people in the know say "sticks". 


So pretty.


After much deliberation, I settled on a a Cymbidium. Which is quite a lot larger than the Phalaenopsis I currently have, but promises to be absolutely gorgeous come flowering time. 


Lisa and the new "child" in the back of my car - told you it was big.


The Exotic Plant Company is owned by Michael Tibbs, and located on the Môreson Wine Estate on Happy Valley Road, Franschhoek.


Such beauties.


Orchid lovers, I would highly recommend this book by Michael Tibbs - Orchids - A practical guide to care and cultivation. 


Open 7 days a week from 10.00 to 16.00


For more of our day in Franschoek, have a look here


If you love Orchids or Franschoek and have any recommendations, please do let me know.


xx C


All images my own. 

22 May 2012

Breakfast...

Alice in Wonderland - Image from Pinterest 


What are your favourite breakfast dishes? Let me know, I'm always looking for breakfast inspiration.

xx C

21 May 2012

French Onion Soup

Once a year there comes a day when all moms look expectantly at their offspring with that little sparkle in their eye. You might think that sparkle is love or pride, but no. The sparkle is a message: This is the one day you have ALL YEAR to make me feel special. DON'T mess it up!

That day was last Sunday in South Africa. Instead of a gift, my fiance (yup, he's a keeper) and I cooked lunch for the family and more specifically, the mums. You can take a peek at the Menu here.

There were a couple of requests on the menu, but I was able to choose the starter. I chose French Onion soup.  

French Onion is one of those all time classics, that everyone loves but hardly ever makes themselves, and in fact it's pretty easy! The first time I made it, I couldn't believe how simple, impressive and delicious it was! The recipe book, (a gem from kitchen heaven) is Julia Child's Mastering the Art of French Cooking, which if you've read my previous posts, you'll notice it's a favourite


Loved her before the movie - Image from Pinterest


It might sound a bit cliche and possibly a bit familiar if you've seen the movie. But in all honesty every recipe I have made out of this recipe book has been incredible and delicious and has my finance, guests and family begging for more. I would advise anyone who loves cooking, and learning about food to get their hands on a copy. It's pretty pricey, but it's a cooking bible. 


 Go. And. Get. It. - Images my own


French Onion Soup
Julia Child
  • 5 -6 Cups onions, thinly sliced 
  • 1T Cooking oil
  • 2T Butter
  • 1/2t Sugar
  • 1t Salt  
  • 3T Flour
  • 6 cups beef stock - try Nomu Beef Fond
  • Cup dry white wine
  • 1 Bay leaf
  • 1/2t Ground sage
  • Salt and pepper
  • 350g Swiss Cheese, grated - try Emmental 
  • 120g Parmesan Cheese, grated
  • 1/2 Raw onion
  • 2 -3t Cognac / Brandy 
  • Slices French bread 
  • 4T Olive oil, for drizzling.
Method: 
Place heavy bottom pot over medium-low heat. Add 1T cooking oil, 2T butter to pot.

Add sliced onions and stir until they are evenly coated with the oil. (Make sure you have sunglasses handy, a window open or one of these babies, I wept cutting these onions)

Cover and cook for about 20 minutes until they are very tender and translucent.

To brown or caramelize the onions turn heat under the pot to medium or medium high heat. 

Add 1/2t sugar and 1t salt and continue to cook uncovered, stirring frequently until the onions have browned and reduced significantly. 

Once caramelized, reduce heat to medium-low and add 3T flour to the onions. 

Brown the flour for about 2-3 minutes trying not to scorch it. (If the flour does not form a thick paste, you can add a bit more butter here).


Don't be scared if it doesn't look great now, the end result is amazing!


Stir in about 1 cup of warm stock, scraping the bottom of the pan to get up all of the cooked-on bits. 

Add the rest of the stock, wine, sage, and bay leaf to the soup. 
Simmer for 30 minutes.


Simmering - Image my own
 

To make the "Croutes" (toasted bread), heat oven to about 220C.

Drizzle each side of the bread slices with a bit of olive oil and place on baking sheet. Don't soak it, just a drizzle. 


Sliced French Bread, try not to steal any before it goes in the oven - Images my own


Cook the Croutes for 15 minutes in oven on each side (30 minutes total). 

Check the soup for seasoning and add salt and pepper if needed. 
Remove the bay leaf (if you can find it).

Transfer to a pretty serving dish, this needs to be oven proof. Don't take a chance. Rather go functional than pretty if you aren't sure!  

At this point you can add the 2-3T Cognac/Brandy and grate the 1/2 raw onion into the soup. This is optional, I like it with and without, if the idea of raw onion doesn't grab you leave it out. It doesn't make or break the dish. 

Add a few grams of the Emmental directly into the soup and stir. 
Place the toasted bread in a single layer on top of the soup. 

Sprinkle the rest of the cheese in a thick layer on top of the bread making sure to cover the edges of the toast to prevent burning. 

Drizzle with a little oil or melted butter, again this is optional. Cheese has quite a bit of oil on it, so use your discretion. I don't usually add the oil or butter, the natural oil from the cheese is enough for me. 

Place in a 200C oven for about 25-30 minutes, depending on your oven. Keep an eye on it, should it look ready, it probably is.
Turn on the grill and brown, just watch out, cheese burns in the blink of an eye.  

Let cool for a few minutes. Take the entire serving dish to the table, and serve there. Makes for an impressive dinner/starter. I paired it was a Chardonnay and it was amazing.


Absolutely delicious and rather impressive - Image my own


For a family the size of mine I always double the recipe, and it doubles perfectly.


The ultimate reward... Empty bowls! Definite food love!


What did you get up to for Mother's Day, make anything interesting and delicious, tell me about it! Would love to hear from you all!

Enjoy! 

xx C